
How to Prep Your Nails for Long-Lasting Polish: The Ultimate Guide for Chip-Free Manicures
You spend an hour creating the perfect manicure, admiring your flawless nails in the light.
Two days later? Chips everywhere.
Sound familiar?
Here’s the truth most nail tutorials won’t tell you: The secret to long-lasting polish isn’t in the application—it’s in the preparation.
While most people rush straight to the fun part (picking colors and painting), professional nail techs know that 80% of a manicure’s success happens before the first drop of polish touches your nail.
The game-changing reality: Proper nail prep can extend your manicure from a disappointing 3-5 days to an impressive 2-3 weeks.
That’s not just a small improvement—that’s revolutionary.
Whether you’re a nail art enthusiast tired of constant touch-ups, a busy professional who needs manicures that last, or someone who just wants to stop wasting money on products that chip immediately, this guide will transform your nail game forever.
What You’ll Discover:
- The 8-step professional prep system that nail techs use
- Why your nail type changes everything (and how to work with it)
- Seasonal adjustments that most guides completely ignore
- The biggest mistakes that doom DIY manicures from day one
- Troubleshooting solutions for every polish problem
Bottom Line Promise: Follow this system, and you’ll never have to deal with disappointing chip-fest manicures again.
Ready to unlock the secret? Let’s dive in.
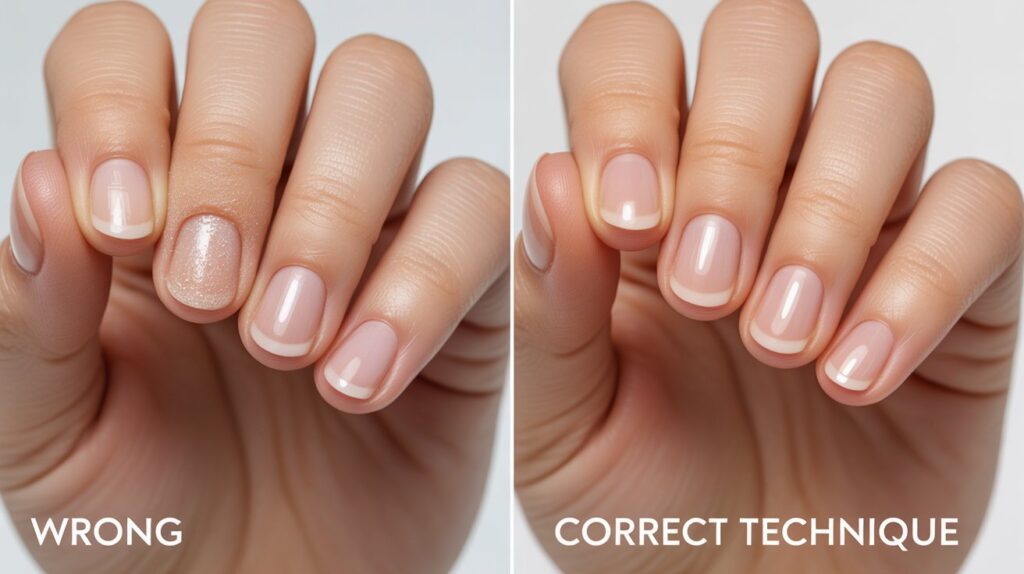
Why Nail Prep Makes or Breaks Your Manicure
Think of nail prep like priming a wall before painting.
Without proper preparation, even premium polish won’t stick.
The Problem: Natural oils, moisture, and microscopic debris create an invisible barrier.
The Science:
- Polish needs texture (smooth surfaces repel adhesion)
- Oil is the enemy (creates slippery barriers)
- Moisture affects curing (prevents proper hardening)
- pH balance matters (interferes with chemical bonding)
The nail plate is primarily composed of highly cross-linked keratin networks that create a natural barrier. Research shows that nail polish adhesion depends on molecular interactions between the polish polymers and the nail’s keratin structure, making proper surface preparation crucial for lasting results.
The Complete 8-Step Nail Prep System
Step 1: Remove All Old Polish Completely
Start with a completely clean slate.
Remove every trace of old polish, including stubborn bits around cuticles.
Pro tip: Use non-acetone remover when possible. Acetone strips natural oils and creates brittle nails.
The Right Technique:
- Soak cotton pad with remover
- Press onto nail for 10 seconds
- Wipe in one direction (cuticle to tip)
- Use small brush for cuticle cleanup
Step 2: Shape and File for Optimal Strength
File Direction Rule: Always go one way, never back-and-forth.
The Process:
- Start from outer edge
- File toward the center
- Create your desired shape
Shape Matters: Square or rounded nails last longer than pointed shapes.
File Grit Guide:
- 180-grit: Shaping natural nails
- 240-grit: Smoothing and refining
- 400+ grit: Final polish prep
Step 3: Master Cuticle Care
Overgrown cuticles are polish killers. When polish touches cuticle skin, it creates weak points.
This leads to lifting and premature peeling.
Safe Cuticle Process:
- Apply cuticle softener (or warm water soak)
- Wait 2-3 minutes
- Push back gently with orange stick
- Remove only dead, white skin
- Clean under free edge
Budget hack: Use a warm, damp washcloth to soften cuticles.
Step 4: Create Perfect Texture Through Buffing
Gentle buffing creates microscopic scratches.
These give polish something to grip onto.
Scientific studies demonstrate that nail plate structure consists of approximately 196 rows of compact, well-differentiated keratinocytes, and creating controlled surface texture through buffing enhances mechanical adhesion between the polish and nail proteins.
Buffing Rules:
- Use 180-240 grit buffer
- Work in one direction only
- Apply light, even pressure
- Create uniform texture (don’t thin the nail)
Nail Type Warning:
- Oily nails: Buffer more thoroughly
- Dry/brittle nails: Minimal buffing
- Weak nails: Skip aggressive buffing
Step 5: Deep Clean and Degrease
This step makes or breaks most DIY manicures.
Soap residue, natural oils, and lotion prevent adhesion.
Professional Method:
- Wash with dish soap (cuts oils better)
- Rinse and dry completely
- Wipe with rubbing alcohol using lint-free pad
- Air dry for 30 seconds
DIY alternative: Mix equal parts white vinegar and water.
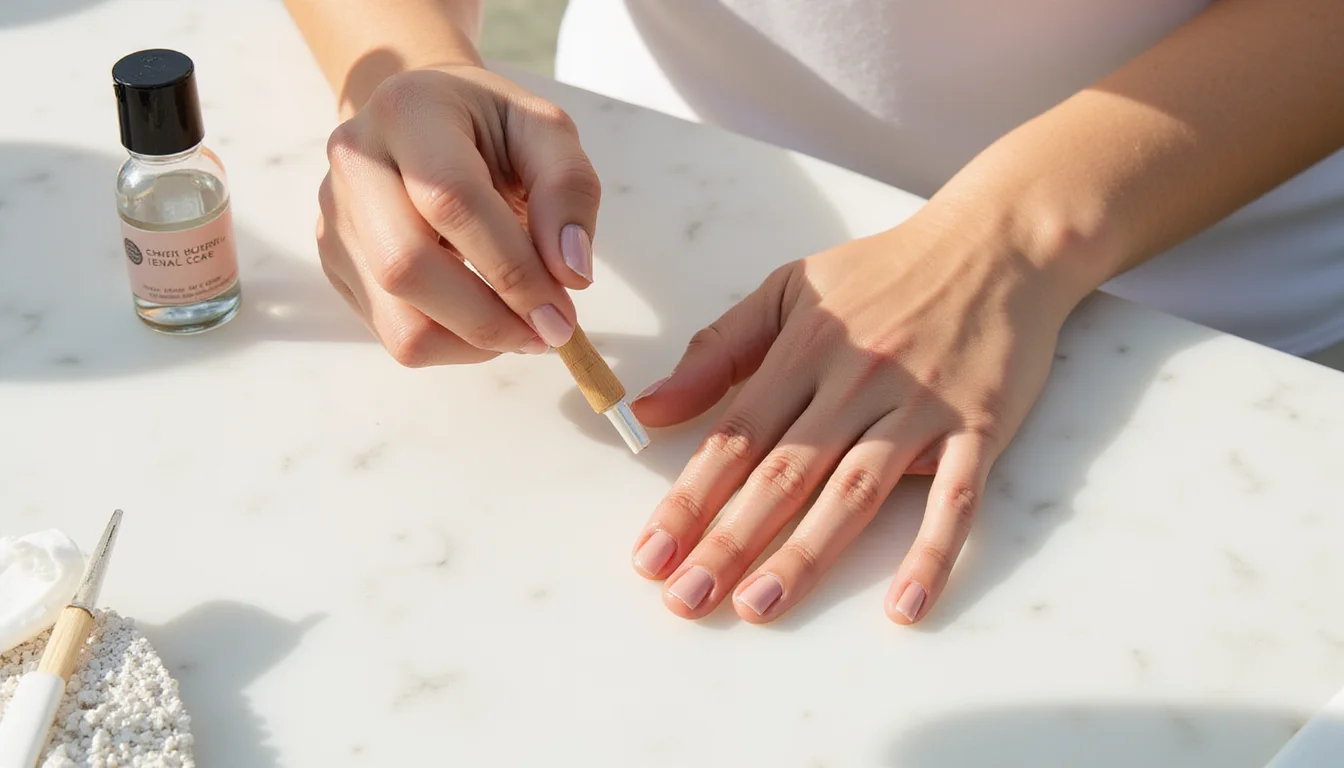
Step 6: Apply Nail Primer (Game-Changer)
Primer creates the ultimate bonding layer.
This significantly extends wear time.
The FDA recognizes that nail products must contain specific bonding agents to ensure safe and effective adhesion. Professional-grade primers work by chemically bonding with the nail’s keratin structure to create optimal polish adhesion.
Primer Types:
- Acid-free: Safe for regular use
- Acid primer: Stronger bond, use sparingly
- Dehydrating: Perfect for oily nails
Step 7: Remove All Dust and Debris
Filing and buffing create microscopic particles.
These cause bumps and adhesion problems.
Clean-up tools:
- Soft dusting brush
- Clean makeup brush
- Lint-free wipe
Step 8: Final Quality Check
Before your first coat, ensure: ✅ Nails completely dry and oil-free ✅ No dust or debris remains ✅ Cuticles cleanly pushed back ✅ Nail surface has slight matte texture
Discover Your Perfect Nail Prep Routine
Not all nails are created equal. Take our interactive assessment to get your personalized prep plan:
💅 Nail Prep Assessment
Get personalized nail prep recommendations for your nail type
Your Custom Routine:
Nail Type-Specific Strategies
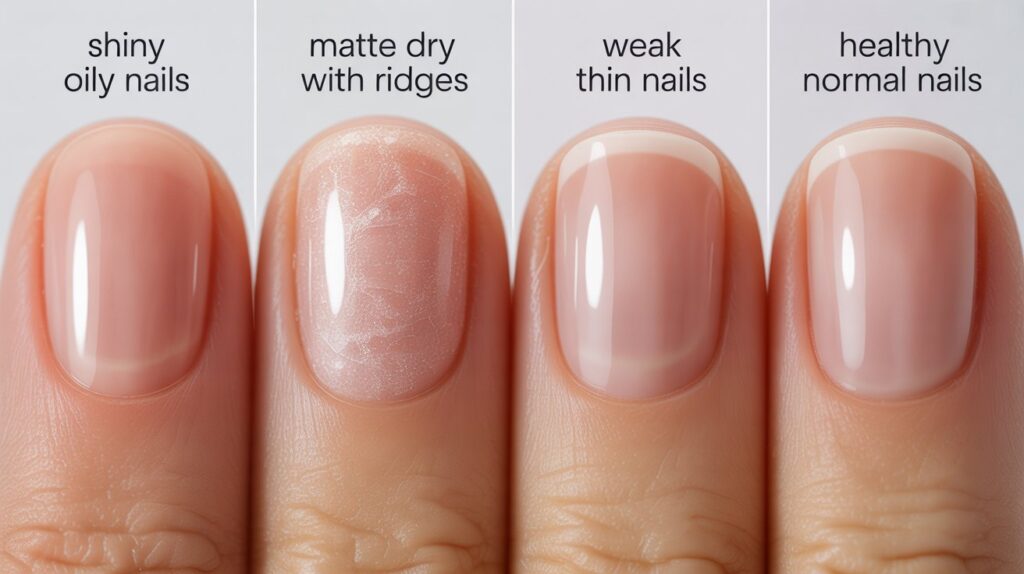
🌟 Oily Nails
Signs: Shiny without polish, poor adhesion
Enhanced Protocol:
- Double-buff to remove shine
- Use strong dehydrating primer
- Apply thin base coats
- Allow extra drying time
🌸 Dry and Brittle Nails
Signs: Matte appearance, ridges, splitting
Gentle Approach:
- Moisturize night before (not day-of)
- Minimal buffing
- Use strengthening base coat
- Apply cuticle oil 24 hours prior
💪 Weak or Damaged Nails
Rehabilitation Strategy:
- Use strengthening treatment 1-2 weeks first
- Apply ridge-filling base coats
- Keep nails shorter during recovery
- Consider professional help for severe damage
✨ Normal Nails
Maintenance Mode:
- Follow standard 8-step routine
- Regular cuticle care
- Quality base and top coats
- Consistent technique
Seasonal Prep Adjustments
❄️ Winter Challenges
Cold air and low humidity dehydrate nails.
This makes them brittle and chip-prone.
Winter Modifications:
- Richer cuticle oils night before
- Extra drying time (humidity changes)
- Room temperature polish storage
- Slightly thicker base coats
☀️ Summer Considerations
High humidity prevents proper drying.
Heat makes products too thin or thick.
Summer Adjustments:
- Fast-drying topcoats
- Thinner coat application
- Cool, dry product storage
- Consider gel formulas
Common Mistakes That Ruin Manicures
⚠️ The “Skip Steps” Trap
Rushing through prep is the #1 failure cause.
Every step has a specific adhesion purpose.
⚠️ Over-Filing Damage
Aggressive filing creates nail weak points.
Use gentle, consistent pressure instead.
⚠️ Oil Residue Problem
Tiny amounts of lotion or oils cause sliding.
Always finish with thorough alcohol wipe.
⚠️ Cuticle Contamination
Polish on cuticle skin lifts and peels.
It takes surrounding polish with it.
Quick Troubleshooting Guide
🔧 Polish chips within 24 hours
Causes: Oily nail bed, insufficient prep, thick application Solutions: Re-degrease, use primer, thinner coats
🔧 Polish peels off in sheets
Causes: Oil barrier, trapped moisture, incompatible products
Solutions: Use dehydrator, complete drying, check compatibility
🔧 Bubbles in polish
Causes: Shaking bottle, thick application, trapped moisture Solutions: Roll bottle instead, thinner coats, ensure dry nails
🔧 Uneven color coverage
Causes: Poor prep, uneven application, low-quality polish Solutions: Proper buffing, quality base coat, thin even layers
Professional vs. DIY Success
💎 Professional Advantages
- Specialized high-quality tools
- Experience with different nail types
- Controlled environment conditions
🏠 DIY Success Strategies
- Invest in key quality tools
- Create dedicated workspace with good lighting
- Take your time (rushing = mistakes)
- Practice improves technique
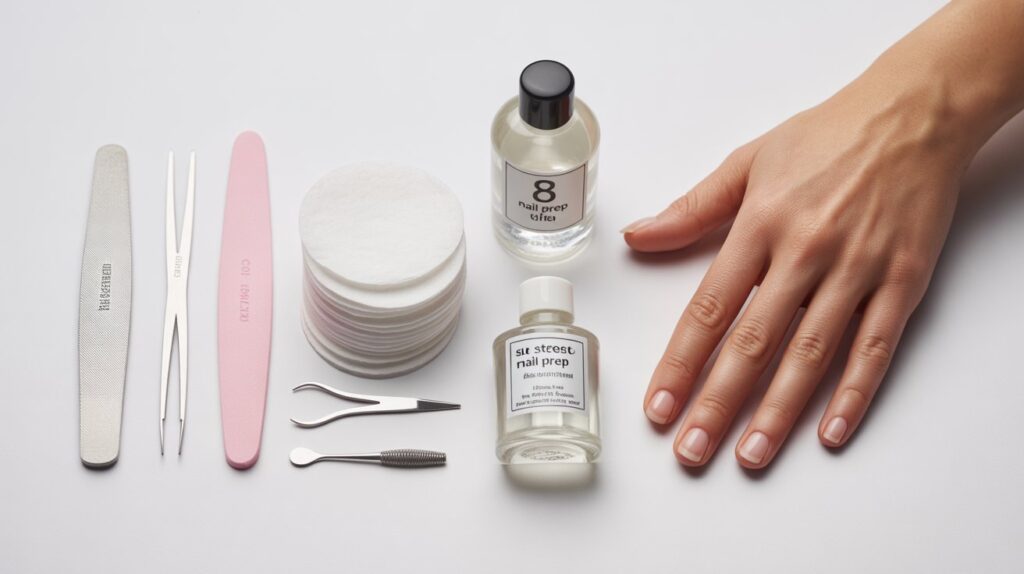
The Complete Prep Toolkit
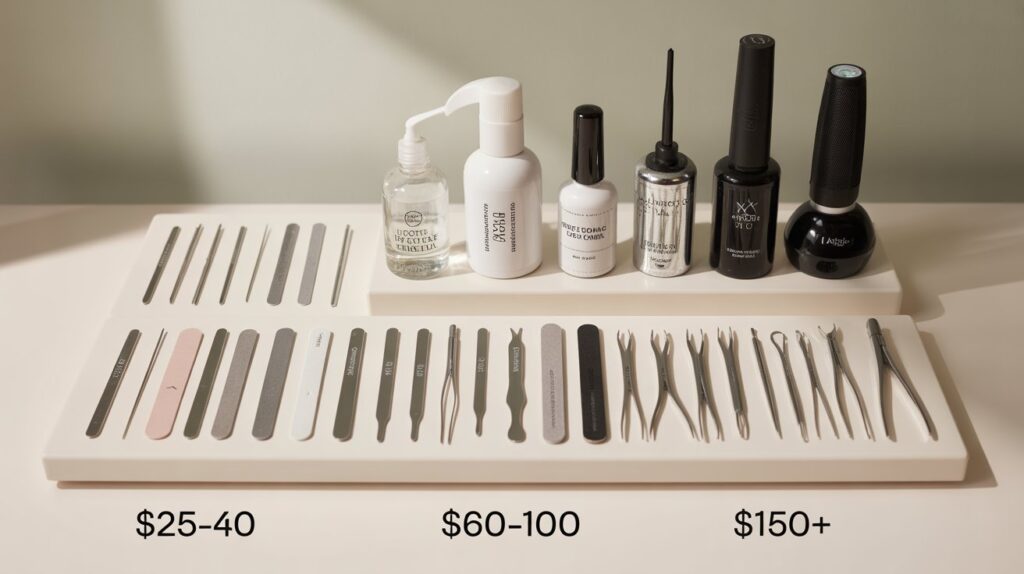
💰 Essential Budget Kit ($25-40)
- 180/240 grit nail files
- Rubber-tipped cuticle pusher
- Small scissors or nippers
- Lint-free wipes
- Rubbing alcohol (70% isopropyl)
🔧 Professional Upgrade ($60-100)
- Glass nail files (longer lasting, gentler)
- Professional cuticle nippers
- Nail dehydrator/primer
- Dusting brush
- LED nail lamp for gels
💎 Luxury Investment ($150+)
- Complete gel system with lamp
- Professional-grade buffers and files
- Cuticle care system
- Multiple primer types
Your 4-Week Success Plan
Week 1: Master cleaning and shaping basics
Week 2: Add cuticle care and buffing techniques
Week 3: Incorporate primers and advanced steps
Week 4: Fine-tune based on your results
The Bottom Line
Nail prep isn’t about following steps blindly. It’s about understanding your nails.
Create optimal conditions for long-lasting, beautiful polish. With the right foundation, your at-home manicures rival salon results.
Start today: Take the assessment above, identify your nail type, gather basic tools, and begin with proper cleaning and shaping.
Your chip-free future starts now! ✨
Remember: Every nail expert started as a beginner. The difference between frustrating chip-fests and gorgeous long-lasting manicures isn’t talent—it’s technique.
You now have the professional secrets. Time to put them to work!
Key Takeaways:
- Proper prep extends manicure life by 300-500%
- Each nail type needs specific adjustments
- Seasonal changes affect product performance
- Quality tools matter, but technique matters more